
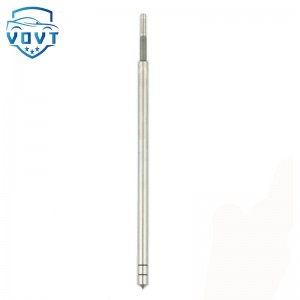
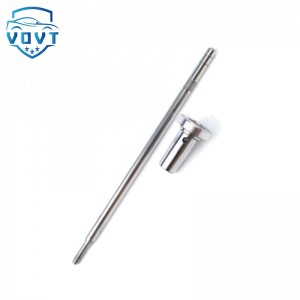
High Precision New Diesel Injector Control Valve F00V C01 202 F00VC01202 Valve Assembly for Fuel Injector Engine Spare Parts


Products Description
| Reference Codes | F00VC01202 |
| Application | / |
| MOQ | 6 PCS |
| Certification | ISO9001 |
| Place of Origin | China |
| Packaging | Neutral packing |
| Quality Control | 100% tested before shipment |
| Lead time | 7~10 working days |
| Payment | T/T, L/C, Paypal, Western Union, MoneyGram or as your requirement |
Function of the injector valve assembly
1. Inspection steps and methods
1. Appearance and installation status inspection
Visual inspection:
Check whether the valve assembly (valve seat, ball valve, armature, etc.) has cracks, deformation or wear marks, especially pay attention to whether the mating surface (such as the sealing surface of the ball valve and the valve seat) is smooth, whether there are scratches or carbon deposits.
Check whether the connection parts (such as the interface between the solenoid valve and the valve assembly, the oil circuit joint) are loose, leaking, and whether the sealing ring is aging and damaged.
Tool assistance:
Use a magnifying glass to observe the sealing belt of the valve seat and the ball valve. Under normal circumstances, a uniform and continuous annular contact belt should be formed. If there are breakpoints or unevenness, it may cause sealing failure.
2. Sealing test
Static sealing test:
Disconnect the injector circuit, connect the valve assembly to a special test bench, apply the rated fuel pressure (such as 100-150bar), and observe the pressure drop within 30 seconds. If the pressure drop exceeds 5bar, there may be poor sealing between the valve seat and the ball valve.
You can also connect a hose to the oil return port of the valve assembly, immerse it in a container filled with diesel, and observe whether bubbles emerge after applying pressure. If bubbles continue to appear, it means that the seal has failed.
Dynamic sealing test:
Install it on the engine, start the vehicle and run it at idle speed, and observe whether the oil return volume is abnormal (under normal circumstances, the oil return volume should be small and stable). If the oil return volume suddenly increases, it may be that the valve assembly is worn and causes excessive oil leakage.
3. Function and responsiveness test
Solenoid valve action test:
Use a multimeter to measure the resistance of the solenoid valve coil (usually 10-15Ω, refer to the vehicle manual for details). If the resistance is abnormal (short circuit or open circuit), it means that the solenoid valve is damaged and the valve assembly needs to be replaced.
When the power is on, close to the valve assembly, you should be able to hear a clear "click" sound. If there is no sound or the sound is weak, it may be that the armature is stuck or the solenoid valve has failed.
Injection timing and oil quantity test:
Use an injector tester to simulate different engine working conditions (idling, acceleration), and observe whether the injection timing and injection quantity controlled by the valve assembly meet the standard. If the injection delay or oil volume deviation exceeds 5%, check whether the valve assembly is lagging or stuck.
2. Maintenance measures and precautions
1. Daily cleaning and maintenance
Clean the valve assembly regularly:
After disassembling the valve assembly, soak it in clean diesel or special fuel system cleaner for 10-15 minutes, and use a soft brush to gently brush the surface carbon and oil stains, and avoid using metal tools to scratch (the fit clearance is only 3-6 microns, and hard objects can easily damage the sealing surface).
Focus on cleaning impurities in the ball valve, valve seat and oil drain hole. Compressed air can be used to blow dry the residual liquid in the channel to ensure that the oil path is unobstructed.
Fuel quality control:
Use high-cleanliness fuel to avoid impurities (such as colloid, moisture) from entering the valve assembly. It is recommended to replace the fuel filter every 5000-10000 kilometers to reduce the wear of the valve seat and ball valve by particulate matter.
2. Replacement of worn parts
If the following problems are found during inspection, the valve assembly or related parts need to be replaced:
Deep scratches, pits or corrosion on the sealing surface of the ball valve or valve seat.
The armature assembly is stuck and cannot be reset freely (may be due to spring fatigue or impurities).
The insulation layer of the solenoid valve coil is damaged or the resistance value is abnormal.
When replacing, use the original or matching valve assembly. Apply a small amount of clean fuel on the sealing surface before installation to ensure a tight fit and avoid deformation caused by excessive force during installation.
3. Precautions for installation and debugging
Pressure relief before installation:
Before removing the injector, disconnect the power supply of the fuel pump, start the engine until the fuel is exhausted, release the pressure of the fuel system, and avoid safety hazards caused by fuel injection during disassembly.
Sealing and torque control:
When installing the valve assembly, ensure that the sealing ring is in the correct position and tighten the fixing bolts according to the specified torque (such as 10-15N・m). Overtightening may cause deformation of the valve seat, and over-loosening may cause oil leakage.
Debugging and verification:
After maintenance, start the vehicle and observe whether the idle speed is stable, whether there is abnormal shaking or oil leakage; during the road test, check whether the acceleration response is sensitive and whether the fuel consumption is normal. If there is an abnormality, recheck the valve assembly function.
3. Maintenance cycle and recommendations
During routine maintenance (every 20,000 kilometers), the valve assembly status can be checked simultaneously with the fuel system cleaning.
If the vehicle has symptoms such as difficulty starting, unstable idling, soaring fuel consumption or excessive emissions, the valve assembly should be repaired in time to avoid the expansion of the fault.
For high-mileage vehicles (over 100,000 kilometers), it is recommended to conduct professional inspections on the injector valve assembly every 50,000 kilometers to prevent performance degradation due to wear.
Products categories
-
Common Rail Control Valve Assembly F00VC01052 f...
-
China Made Brand New Common Rail Fuel Injector ...
-

New Common Rail Valve F00VC01362 for Injector 0...
-

Auto parts Diesel Fuel Injector Control Valve F...
-

High Precision New Diesel Injector Control Valv...
-

High Quality Common Rail Control Valve Set Asse...


